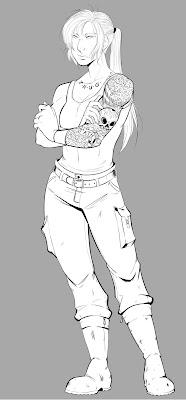
Campaign Paradiso - Ariadna Impressions 2
Alright. Mission 102 down, and I'm still convinced that Irmandinhos are Corvus Belli's gift to Ariadna players everywhere. I'm also convinced that Ariadna does really well with two combat groups.
This time I played Aleph, my least favourite faction to play against because of all those ODDs, not to mention the MSV3 (almost ubiquitous among Aleph players in our group). I knew that I was coming up against them, though, so I made sure to be ready. Here's what I took.
Task Force Blue
Chasseur (Minelayer)
Cateran (T2 Sniper)
Kazak Doktor
Irmandinhos (Chain Rifle)
Caledonian Volunteer (Chain Rifle)
Intel (Holoprojector 1, Minelayer)
Line Kazak (Rifle)
Task Force Red
Chasseur (Rifle, Light Flamethrower)
Father Lucien Sforza (pretending to be a Metro Rifle)
Dozer (Control Device)
Tankhunter (Autocannon)
Traktor Mul (Minesweeper)
Traktor Mul (Minesweeper)
Irmandinhos (Chain Rifle)
Warcor
Line Kazak (Lieutenant)
Loup Garou (Viral Rifle, Flash LGL)
Task Force Blue was chiefly designed to present an ARO threat to those multi-wound Aleph jerks. Aleph really doesn't like Shock ammo, so I was aiming to place Mines pretty much everywhere (especially close to Point 5, the one that my opponent had to get close to). The Line Kazak and Volunteer were there to bolster my order pool.
Task Force Red was designed to propel my Engineers towards the objectives. I added a few ARO threats in there as well, just in case my Task Force Blue threats got wiped off the map. Since I knew my opponent would be pushing models up the board, I took a Flash Light Grenade Launcher for some Speculative Fire madness.
In the end, my opponent - the talented and very awesome Century - didn't end up bringing the Asura I so feared. Instead, I stared down a Myrmidon with Spitfire, Deva with MSV2/Spitfire, and a Sophotect with two helper-bots among other crazy Aleph threats. After a few miserable scatters from my Chasseurs (both ended up in my deployment zone, on my table edge...), I sustained an early casualty as my Loup became the primary target of a Naga Sniper.
It was all part of the plan, though...well, mostly. I had planned on losing most of my ARO-dedicated models towards the greater goal of scoring points, and that didn't even happen. At least not completely. On to some unit highlights!
Highlights
The Cateran was one of the real all-stars here. I set up him up on the flank closest to Century's Sophotect, but he didn't really join the fray until the third turn or so. If I remember correctly, he managed to destroy a Deva Spitfire on one turn, then put a giant hole in the Sophotect (critical hit!) near the end. With Century's only Engineer dead, he had no choice but to rush his troops at me to keep me from scoring any more points. This final rush ended up with his Chandra taking out my Cateran, but I think it was well worth it.
My Chasseurs (both of them) ended up scattering so far back that they started at my edge of my deployment zone, as far from the battle as humanly possible. Paradoxically, this pretty much made them the opposite of priority targets, even though they were out in the open. I kept Century busy with other models and with objective-takers, so my Chasseurs were left mostly unmolested. This turned out to be a really good thing, because it let me use them to lay down minefields in the late game: one Chasseur basically rendered the middle objective unreachable, and the other one took bloody vengeance on a Myrmidon Spitfire that was stomping through my centre line.
The Irmandinhos (one with E/M Grenades, the other with +2 ARM) both shone like bright little stars this game, as their speed and Smoke Grenades/high PH made it very hard for my opponent to get rid of all my Engineers. In the end, both of them died to a very angry Myrmidon Spitfire, but not before they scored (or helped score) 4 points. I really think that these guys are essential in any Campaign: Paradiso list.
Father Lucien Sforza may have died for good this game, but not before taking out a pain-in-the-ass Naga Sniper and making life prickly for Century's right flank. I really didn't mind paying 23 points for a fast swiss army knife with BS13, especially one that cleared the only dangerous sniper lane in the entire game. I wish he hadn't died (I had a Doctor and two Baggage remotes), but I'm not going to lose sleep over it because I've got a few Loups waiting in the wings.
My Dozer saved the day, as usual. She managed to pick up the data from an Irmandinho's corpse and run full-tilt towards the last objective point. She managed to claim me another objective point with my very last order just before being shot in the face by Century's Deva Lieutenant, but I like to think that my Doktor got there in time to save this heroine. I love bringing an easily-controlled Engineer along with my Irmandinhos, especially because this is the second time that the Dozer has picked up the data from some very dead pirates.
The mighty Tankhunter blew open one of those damned helperbots on the reactive turn, and made sure that a certain Lhost Engineer didn't come out from behind her rock for at least a little while. Well, at least from one possible angle. The Tankhunter belonged to my crew of "2+ wound" AROs, and he definitely did his job by standing there and looking scary.
Anyway, this game was really close, and Century and I both had a lot of fun fighting over the objectives. Things got really tense at a few points, but it was the "oh man, what's going to happen?" sort of tension that comes when things really get down to the wire. I can't wait to see what happens next.


Comments
Post a Comment